Back in January and February of this year, I took a class on beekeeping through the ISU Extension Service. I've always wanted to do it and after meeting a beekeeper in Hawaii last year, I was dead set on starting a couple of hives. After finishing the class, I ordered two 4-pound packages of bees, and all the equipment and gear to get set up with two hives. In April, itl arrived and Greg and I put it all together and installed the bees. All summer I've been monitoring them and watching them build comb, forage for nectar and pollen, raise baby bees, and make honey. Because this was the first year, I wasn't sure there was going to be enough honey for me to take any and still leave enough for them to survive through the winter. Turns out, they were pretty busy this summer, and apparently had no problem collecting plenty of nectar. Last week I checked on them and decided Labor Day weekend would be Harvest Day. I ordered a small honey extractor, five-gallon buckets, plastic jars, filter screens, and gathered up some odds and ends from around the house to use as tools (bread knife, stainless steel pot, metal colander, clean towels).
Saturday morning, Greg and I washed all of the equipment and set up a work table on saw horses in the garage, after cleaning the place up as much as possible. Then, I suited up in my bee suit, gathered up my smoker, hive tools, and other equipment, and Greg and I headed out to the hives. The plan was for me to pull the boxes off, sweep the bees off with the brush, and put the boxes into the Jeep. Greg's job was to get it all on film.
Before we headed out there, I made a small wooden frame, about the size of the perimeter of a hive box, out of scrap wood. I stretched a black dish towel over this frame. This was my home made fume board. I had ordered this stuff called Bee Robber which comes in a bottle, wrapped in a plastic bag, then stuffed inside a larger plastic container. It Stinks!!! The triple packaging is to prevent any of it getting on anything you intend to keep. This fume board frame dealie was going straight into the trash as soon as I was done with it. I drizzled a few drops of this stuff onto the black fabric. The way it is supposed to work is the stuff starts to smell as the sun heats up that black fabric. You put the frame on top of the hive box and leave it for a minute or so, and it is supposed to drive the bees down into the hive and out of the box you are intending to harvest. Well, since it was only about 70 degrees when we went out there, I don't think it ever heated up enough to really have an effect, or maybe I didn't use enough of it or whatever, but after several minutes, it had had no effect on the bees.
After putting the fume board aside, I took off the top two boxes and set them aside since neither contained completely filled frames of capped honey. The third box was mostly full but there were a few frames that were not capped, indicating the honey was not yet dry enough to be harvested. Instead of harvesting full boxes, I ended up taking about six frames out of the fullest box on each hive, and just putting the frames in the back of the jeep. I reassembled the hives, gathered up all of my tools, and we headed back to the house. Pretty painless. No stings, and no mess in the Jeep. The bees will continue making honey until probably mid October. The goldenrod and ragweed are about to really start blooming so the honey they store from now on will be darker and have a more rustic or molasses like taste. I'll let them keep it for the winter, and I'll probably put the feeders back on in a couple of weeks to make sure they make enough food and get it stored before it gets cold.
Once we got back to the house, we carried the frames into the garage and set them in an extra hive box. With both of us working, we used the serrated bread knife to shave off the cappings, which fell into the metal colander that was suspended over a stainless steel pot. Then two frames at a time went into the extractor. This extractor is essentially a plastic drum with a contraption that sits on a bearing in the bottom of the drum. It holds two frames at a time. You hand crank it to spin it as fast as possible, and the uncapped honey that is still left in the frames, gets thrown out of the combs and up against the inside walls of the extractor. It then runs down and collects in the bottom of the plastic drum, and there is a gate valve at the bottom that allows you to drain the honey out of the drum.
I had ordered three filter screens, a 600 micron, a 400 micron, and a 200 micron. They nest inside each other and fit on top of a five gallon bucket. The extractor was on top of the work table with the valve extended over the edge. With the valve closed we spun/extracted about a half dozen frames, then stopped, opened the valve and allowed the honey and some of the wax comb to run down through the screens and into the five-gallon bucket that was sitting on a small stool directly under the valve. Once we had processed six frames, we shut the valve and did the other six. We tilted the extractor forward and propped it up on some scrap wood so it could drain completely. We also poured the honey that had collected in the stainless steel pot during the uncapping step, into the filter screens. All in all, I think we have about three gallons of honey and a big pile of very clean beeswax to play around making candles or lip balm or whatever. I'll need to compress the wax to squeeze any remaining honey out of it and then melt it down in a coffee can or something into a block and then save it until I'm ready to use it for something.
After several hours, the filters were finally empty and all of the honey was collected in the five gallon bucket, which also has a gate valve. I had ordered two cases of 12 ounce plastic bottles and nutrition labels for them from the beekeeping supplier, Mann Lake, out of Minnesota. Since Greg and I had plans to have dinner down at Honey Creek Resort on Lake Rathbun, we decided to take a bottle of honey to Pat Koffman, the chef there. Pat's a good friend of ours and is always interested in what's going on the vineyard, what we're growing in our garden, and so forth. At some point I hope to be growing herbs and vegetables for the restaurant, probably once I have a high-tunnel greenhouse and can grow veggies from March through December. Anyway, I wanted him to have some of the honey so we washed and dried one of the bottles and filled it with the honey from the five-gallon bucket. Ideally, the honey should set for a few days so any trapped air bubbles can float to the surface of the bucket and be skimmed off, but since we were headed down there for dinner, I figured it'd be okay. Turns out, it was almost crystal clear, hardly any bubbles at all, and a beautiful golden color. I had made some cute tags for the bottles so I tied one on it and it was ready to go. The restaurant was packed to the gills but we caught up with Pat and I handed it off. Can't wait to hear what he thinks about it. We'll wait a day or so to bottle the rest of the it.
Sunday, September 4, 2011
Tuesday, August 30, 2011
Open the Pod Bay Doors Hal.
I'm sorry Dave, I'm afraid I can't do that.
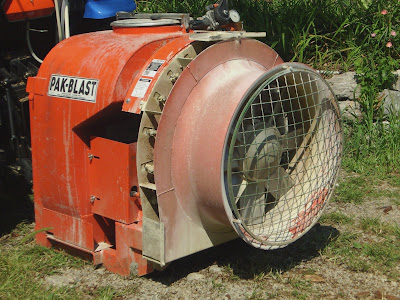
Heh, no this isn't the escape pod from the International Space Station... It's our new air-blast vineyard sprayer. It arrived today on a flat bed trailer. It's a few years old and we got a good deal on it. We'll clean it up and use it once the vines go dormant this fall to spray lime sulfur fungicide on the canopy once we move the sheep out of the vineyard.
Monday, August 29, 2011
Cynthiana
The Cynthiana grape is only marginally successful in Iowa because it has a very long growing season and in some years we get a hard freeze early enough in the fall that it is not yet ripe when the vines shut down for the winter.  We put this vine in our vineyard because we're pretty optimistic that we are far enough south in Iowa that we have a good chance of getting it to ripen in most years. This is the first year these vines have produced a decent crop as it has taken a while to get them established in our vineyard. We think it is worth trying to grow this grape here because it makes a very good, full-bodied red wine when fully mature, and fills a niche that most of the cold-climate hybrids are not able to fill. It ages well, responds well to oak, and has lots of tannins, which smooth out as the wine ages.
Cynthiana is considered to be a genetically true American grape (Vitis aestivalis) as opposed to the more familiar European grapes of the genus/species (Vitis vinifera), such as Cabernet Sauvignon, Chardonnay, and Pinot Noir. It was grown extensively in the Eastern US, particularly in Virginia where it was first noted, and also the Midwest prior to Prohibition, which pretty much wiped out the wine industry east of the Rocky Mountains for decades. It is grown extensively in Missouri and parts further south, and is actually the state grape of Missouri. It is often made into a high quality dry red which is aged in oak barrels, and once bottled, some additional aging is usually recommended before drinking.
Wines made from cold climate hybrid grapes (the majority of the grapes grown in the Upper Midwest) tend to be a little thin when it comes to mouth feel so being able to grow the non-hybrid Cynthiana in this area really fills an important space in a cold climate winery's repertoire. New hybrid reds are coming along and eventually grape breeders will come up with other combinations of cold-hardiness, good disease resistance, and good red wine qualities, maybe knocking Cynthiana of its perch. In the meantime, Cynthiana, also known as Norton, is holding down the fort for cold climate winemakers looking to make a dry, red wine.
This is an exciting time in cold climate grape breeding and research. There are interesting crosses being made with obscure Eastern European and Russian grapes that have just recently made their way across the Atlantic. There is a huge blank canvas out there, with lots of room for new grapes to take their places in the cold-climate viticulture lexicon.
The more, the merrier!
It comes at the perfect time because more and more wine drinkers seem to be in the mood to try new things. That's great news for winemakers in areas of the country not considered traditional wine regions, as it allows for the development of regional signatures or fingerprints, so to speak. It's a fun time to be learning the ropes. Things are certainly moving quickly as more research and breeding produces better hybrids with the characteristics necessary to succeed in the challenging conditions in the Upper Midwest. It also fits nicely into the Local Food movement. The State of Iowa has been out in front in trying to support and demystify the wine experience by getting out of the way and allowing wineries to do tastings and sell wine at farmer's markets, treating wine as the agricultural product it is, and enabling the public to really get to know their local winemakers and grape growers. It's benefited the wine industry here in a big way (as well as wine drinkers!!!).
Here is a closeup of our Cynthiana grapes as they approach ripening. We are probably still at least three weeks from these being ready to harvest. Greg will be checking the brix (soluble sugars) with his refractometer in the next several days to determine where things stand. We'll need to net these vines soon because the birds will start grabbing them as sugar content goes up.
 We put this vine in our vineyard because we're pretty optimistic that we are far enough south in Iowa that we have a good chance of getting it to ripen in most years. This is the first year these vines have produced a decent crop as it has taken a while to get them established in our vineyard. We think it is worth trying to grow this grape here because it makes a very good, full-bodied red wine when fully mature, and fills a niche that most of the cold-climate hybrids are not able to fill. It ages well, responds well to oak, and has lots of tannins, which smooth out as the wine ages.
Cynthiana is considered to be a genetically true American grape (Vitis aestivalis) as opposed to the more familiar European grapes of the genus/species (Vitis vinifera), such as Cabernet Sauvignon, Chardonnay, and Pinot Noir. It was grown extensively in the Eastern US, particularly in Virginia where it was first noted, and also the Midwest prior to Prohibition, which pretty much wiped out the wine industry east of the Rocky Mountains for decades. It is grown extensively in Missouri and parts further south, and is actually the state grape of Missouri. It is often made into a high quality dry red which is aged in oak barrels, and once bottled, some additional aging is usually recommended before drinking.
Wines made from cold climate hybrid grapes (the majority of the grapes grown in the Upper Midwest) tend to be a little thin when it comes to mouth feel so being able to grow the non-hybrid Cynthiana in this area really fills an important space in a cold climate winery's repertoire. New hybrid reds are coming along and eventually grape breeders will come up with other combinations of cold-hardiness, good disease resistance, and good red wine qualities, maybe knocking Cynthiana of its perch.
 In the meantime, Cynthiana, also known as Norton, is holding down the fort for cold climate winemakers looking to make a dry, red wine.
This is an exciting time in cold climate grape breeding and research. There are interesting crosses being made with obscure Eastern European and Russian grapes that have just recently made their way across the Atlantic. There is a huge blank canvas out there, with lots of room for new grapes to take their places in the cold-climate viticulture lexicon.
The more, the merrier!
It comes at the perfect time because more and more wine drinkers seem to be in the mood to try new things. That's great news for winemakers in areas of the country not considered traditional wine regions, as it allows for the development of regional signatures or fingerprints, so to speak. It's a fun time to be learning the ropes. Things are certainly moving quickly as more research and breeding produces better hybrids with the characteristics necessary to succeed in the challenging conditions in the Upper Midwest. It also fits nicely into the Local Food movement. The State of Iowa has been out in front in trying to support and demystify the wine experience by getting out of the way and allowing wineries to do tastings and sell wine at farmer's markets, treating wine as the agricultural product it is, and enabling the public to really get to know their local winemakers and grape growers. It's benefited the wine industry here in a big way (as well as wine drinkers!!!).
Here is a closeup of our Cynthiana grapes as they approach ripening.
 We are probably still at least three weeks from these being ready to harvest. Greg will be checking the brix (soluble sugars) with his refractometer in the next several days to determine where things stand. We'll need to net these vines soon because the birds will start grabbing them as sugar content goes up.
Friday, August 26, 2011
Log Rolling...
 One of the hardest things we had to do when we turned this former cow pasture into our home and vineyard was taking out several huge oak trees. I made a commitment at the time to turn the logs into something other than firewood. Eventually.
Since we built the garage/apartment back in 2005, we've been procrastinating and postponing building the rest of the house. I guess we've become comfortable in our cozy one bedroom "loft" and the longer we live in it, the harder it is to imagine having a full sized house. Really the only time we notice how small the place is (880 sq ft) is when we have company or when trying to find something in the overcrowded kitchen cabinets, closets, or the garage. We really do need more space around here and have started thinking again about what we'd like to build. We even attended the Greater Des Moines Home Expo to check out about a dozen new homes by various builders and to talk to some of them about our potential project.
Anyway, earlier this month we took a trip out to Wyoming and Idaho with my parents, and we stayed in a cabin/lodge on the South Fork of the Snake River. The home was gorgeous and had been constructed with salvaged timbers from an 80-year-old factory that had been torn down.
This got me to thinking again about the numerous logs just sitting around the property, waiting for me to decide what to do with them. The easiest solution would be to find someone with a portable sawmill that would be willing to come on site and mill all of these logs into usable lumber. Some of these logs have been on the ground for over five years and I've been sort of half-heartedly trying to find a portable sawmill for at least three years. After numerous leads fell through, and after putting it on the back burner several times, I finally located a guy on CraigsList about an hour from here with a portable sawmill. I contacted him last week and he said he'd work us in sometime in October. Great! Well, that gave us plenty of time to plan on what to do with all of this wood. Greg and I are planning to build a small building this fall and some of that lumber would come in handy when we finish the inside, including trimming around the windows, possibly some tongue and groove ceiling or paneling, possibly the floor (?) and definitely some pieces of rustic furniture.
We discussed various options for cutting the wood, and finally settled on 1 x 6 boards for flooring and 6 x 6 timbers that could be used for any number of things, and milled into 1 x 6 boards if we ended up not needing the timbers. On Monday of this week, I got a call from Duane, the guy with the mill, and he said he'd had a cancellation and would I like him to come on Thursday. Of course, I said, without really thinking about what that actually means, including moving some logs out of the front sheep pasture, and figuring out where we were going to dry and store it.
On Wednesday evening, Greg and I moved several logs to one staging area using the tractor and a pull-strap, and one really long log had to be cut into two pieces in order to move it. It was probably 3o feet long.
On Thursday morning, Duane showed up with his sawmill and after some discussion he decided to set up the saw on the top of the hill by the vineyard, which is pretty much the only level spot on the entire property. Not an exaggeration! There were at least a dozen logs up there and we decided that I'd take the tractor and haul all of the logs we'd staged out front up to the vineyard and he would mill all of the logs up there in one spot. After Duane and I manipulated the first log onto the saw, he went to work cutting it into boards and I headed down the hill to start hauling the logs up the hill with the tractor. These logs were all somewhere around 15 to 20 inches in diameter and 14 to 18 feet long. I have no idea what they weighed but based on some of the timbers they yielded, it would not surprise me if some of them exceeded two thousand pounds.
This sawmill was pretty amazing. The logs are rolled onto some curved arms that reach down to the ground. The arms then hydraulically lift the log up onto the platform, and then a giant band saw is lined up and makes a cut horizontally from one end of the log to the other. The log is rotated 90 degrees and another cut is made, and this is repeated until the log is a four sided beam. At that point, the beam is cut into boards or timbers, making the best or most efficient use of the log. Here are a few of the timbers, including one that is 17 feet long.

Once the lumber comes off the mill, it is stacked and the scrap thrown off to the side in a big pile.

Here is a picture of the stack.
 This is about half of the logs. Needless to say, he ended up getting about ten logs milled before running out of daylight, and I have at least that many left to go. Most of the really big ones are done and I think, including the timbers, we are at right around 2000 board feet of milled lumber. The ends of a few of the timbers will need to be cut off to get rid of some bug damage but for the most part, these logs are incredibly solid all the way through. I was pretty surprised that there wasn't more than this little bit of bug damage, given how long these logs have been lying around outside.
By the time we're done with the rest of the logs, I don't think we'll have any trouble getting enough wood to cover any size floor in whatever size house we end up building, plus we have nine timbers that can be used in the house possibly in a timberframe vaulted great room. The flooring will be six-inch wide planks. Some of these logs are over a hundred years old and have very distinctive grain. We'll dry it and play around with some different stains to see what the future floor will look like.
On Saturday morning, Greg and I moved some stuff around in the garage to make room for storing the wood. We initially thought we would need to build a kiln to dry the wood before it could be used, but after talking to the guy with the sawmill, our heated garage should work just fine to get the wood dry enough to use. Here's a picture of where the wood will be stacked.

We'll set up a small fan to circulate the air so the wood dries uniformly. Tomorrow we plan to move the remaining four timbers and all of the 1 x 6 and other miscellaneous boards into the garage so it can start drying as well.
If we get the little building built this fall, we'll have all winter to play around with different things to finish the inside of it. In particular, there is so much scrap left from the mill that we can sort through and rip with the table saw to make furniture quality boards out of. I see some new tools in Greg's future... We plan to put up the little 12 x 16 building and at least get it to the point of being weathertight before winter really gets going and it will be a nice project to work on through the winter. We plan to put a gable loft in it for storage of things like Christmas, luggage, camping gear, and so forth, all of which is currently taking up shelf space in the garage. The majority of the space will be a spare "cabin" for guests.
Friday, August 12, 2011

Saturday, July 30, 2011
Honey, it's hot in here...
 Do you know what comes with Late July heat and humidity? Tons of wildflowers, that's what. I've been checking on my beehives about once a week this summer, watching them slowly build up the comb and fill it with eggs. It's pretty interesting to see the eggs, which are only two to three millimeters long, white and attached to the very bottom of each comb cell, quickly grow into a grub-like larvae that get bigger and bigger until they fill the entire cell. At that point, the bees seal up the cell and each larva transforms into a fully developed bee in about 21 days.
 While I've watched the bee population expand in the bottom two boxes of each hive, I've added additional boxes one by one, and these have been filled with pollen and honey, and eventually just honey. I put the sixth box on each hive today and they'll probably need at least one more each by the end of the summer. I plan to steal the top three boxes off each hive around Labor Day and extract the honey and bottle it. I've already stolen a frame (about two weeks ago) just to see how much the yield would be, and how it tastes. Since it was early season honey, it had a very mild flavor and a light color. As the season progresses, and the bees forage for nectar further from the hives, on more and more diverse flowers, the honey will be darker and the flavor will be more intense in character. A lot of commercial beekeepers collect the early honey in mid summer and leave the darker honey for the bees to feed themselves through winter. Since this is the first year for these hives, I've decided to wait until September to see how much honey they actually make before making the decision about how much I'm going to steal from them. I'll be able to compare the September honey to the sample I collected a few weeks ago to see how much of a difference there is between the two.
If I end up pulling off three boxes from each hive, I'll end up with a total of 60 frames. If each frame yields two pints, I'll end up with roughly 15 gallons of honey, and that's still leaving at least two full boxes of honey on each hive to get them through the winter. As I was lifting the boxes off the stacks this morning, there were two that were 100% full of honey and I was shocked at how heavy they were.
I took each hive apart this morning because I wanted to get a look all the way down in the bottom box on each hive to see if there were any empty frames or if they'd all been built out with comb. I mainly wanted to make sure there was enough room for the queens to keep producing eggs through the rest of the summer. It looks like that is the case. In the process, however, the bees got pretty cranky and I ended up getting stung three times; twice on my right hand, and once through my suit just above the knee. I had one whole hive taken apart and had to walk away for a few minutes to see if they would settle down, and they really didn't. I ended up closing things up and getting out of there but I did add the 6th box on top of each hive before putting the covers on. Greg's going to have to put together another 20 frames soon because with all of the wildflowers blooming right now, they are definitely not even close to shutting down the honey production. I will probably keep adding boxes until I see the first ragweed blooming, then I'll pull off what I'm going to keep, and let them make honey out of the fall ragweed bloom, which they can keep. I've had several beekeepers tell me ragweed honey is not particularly tasty but the bees apparently don't care.
Monday, July 4, 2011
Happy Independence Day!
We'll be firing up Sunny, the clay oven for homemade pizza tonight, and listening to the outlaws up the road fire off the artillery shells or whatever the hell that thing is that goes off every 4th of July...
Wednesday, June 1, 2011
Shoots!
Seeing as this is a "Vineyard Blog," how about some blogging about the vineyard? As usual, spring comes roaring in with lots to do, including mowing, spraying, training vines, and scouting for insect and fungal pests. There's plenty to do out there this time of year. Once the temperatures start getting up in the 80s you really need to stay on top of any disease pressure because warm wet springs set the tone for the rest of the growing season. Diseases that take hold on the leaves and blooms are impossible to eradicate later in the summer once they've affected the fruit.
So, what am I up to out there today? Well, I'm working on the Sabrevois vines, which are well ahead of the Traminette and Cynthiana vines in terms of growth stage. They are really taking off. We grow this particular grape on a trellis style called Vertical Shoot Position. This trellis is typically used with upright growing cultivars and there is a main wire that holds the horizontal cordons, the lateral arms from which the rest of the shoots grow vertically. The main wire is roughly 40" above the ground and then at eight-inch intervals above that there are additional pairs of catch wires. These catch wires are attached on either side of the wooden vineyard posts with little plastic clips that hold them in place during the growing season. These movable catch wires provide a sort of cage that holds the shoots straight up, allowing for good air circulation and good sun exposure for the fruit, which is essential to ripening it. What I'm doing this week is walking along each row of vines and tucking the shoots, some of which are a couple of feet long, inside these catch wires. I'm spreading the shoots out and untangling the ones that have wrapped around each other, and I'm also stripping any new shoots that are coming out of the lower portion of the trunk. I usually let the sheep do this part but I have them out of the vineyard right now because we are spraying a fungicide that they cannot ingest. There is a window of time between the last spray of this particular fungicide and when the sheep can get back in there to graze, so the vineyard is off limits for the time being. Not to worry though, I have run hot wire around the house and I have them currently mowing part of the yard and an area with a lot of brush and weeds that have been a pain in the butt for a couple of years. They're making quick work of it and it will soon look as nice as the rest of the yard.
The Sabrevois grapes are starting to bloom this week. The grape blossoms smells incredible. There's really nothing that smells like a blooming vineyard, but it only lasts for a few days and then it's gone. We've had several days of warm, dry weather which bodes well for good fruit set. This grape is the first to bloom, out of the three cultivars we are growing. It typically ripens in Iowa in mid to late August. We have five rows of roughly 60 vines each of this grape and it is absolutely full of tiny clusters of flowers which will become clusters of tiny grapes in a few days.
Wednesday, May 11, 2011
Beat It Lady!!!

That's pretty much the message I got today when I went out to check the hives. It was hot, in the mid 80s this afternoon, no wind, sunny and humid. I got out to the bee hives and there was quite a bit of activity around the front of the hives, with lots of traffic coming and going through the entrance. It was by far the most activity I've seen thus far. During my last visit to the hives I noted that the top hive box (there are two, one stacked on top of the other) had most of the frames built out with comb and there was lots of nectar filling many of the cells. I definitely saw larvae in both hives but not many capped cells. I tried doing a video with my phone camera but it did not turn out very well. I'll try again in a few days. It's too hard trying to hold the camera still and with the subject framed in the view window, and hold the frame in the other hand. I finally gave up. The main purpose of opening the hive the other day was to put some small pint-jar feeders of sugar syrup on top of the inner covers because it had been cool and rainy and I was worried there might not be much pollen and nectar in the vicinity. I made up a batch of syrup and filled two jars. I used a sharp screwdriver to punch a small hole in each lid and inverted the jar. Sure enough, after a couple of drips, each jar held a vacuum and no more syrup leaked out. Once I got out to the hive I put an empty (frameless) hive box on top of the inner cover and set the inverted pint jar over the hole in the center of the cover. I then put the outer cover on top of the frameless box. I figured the bees would use the syrup if they needed it, and I sort of expected the jars to be empty when I went back to check them today.
Today when I went out there, my plan was to remove the outer cover, refill the jars if they were empty, take off the inner cover, try to locate the queen in each hive, look for larvae, look for new eggs, and look for any signs of mites or other pests. When I closed up the hives I planned to add a third hive box with frames so the bees would have an additional level to keep building comb for the queen. I took two boxes out there with me, and in each of them I had removed a regular frame and added a green plastic drone comb frame. Drone larvae are bigger and require an additional couple of days to fully develop and hatch. For whatever reason, the varroa mite prefers to lay its eggs in drone comb and take advantage of the longer larval development time. One of the non-chemical suggestions for controlling this damaging pest is to put frames in the hive that are designed for drone comb, and the bees will fill it up with drone larvae, and the varroa mites will put the majority of their eggs in there. If you pull the drone frames out of the hives and replace them with fresh ones just before the drones would have hatched out, you have essentially removed much of the varroa population. Most people either scrape the comb off the frame or they put them in the freezer which kills the drones and the varroa larvae, and then they put the frames back in the hives and the workers clean out and discard the now-dead contents of the cells. Sounds gross but it is a pretty effective way to control the population of this particular pest.
Anyway, I got out to the hives and took off the outer cover of Hive #1. The pint jar was missing only about a third of the syrup so they must be finding plenty of flowers to forage on. I set the jar on the platform and took off the inner cover. I puffed a little smoke over the frames and drove the bees down in between them, and lifted one of the center frames with my hive tool. There was a lot of capped comb, which contain larvae in various stages of development, and also newly laid eggs in the bottom of many cells, which are so tiny you can barely see them. That is a good indicator that the queen is alive and doing her job. There were also areas with larvae that had not been capped yet, and also areas on the frames containing nectar (soon to be honey) and pollen of a very dark yellow color, indicating dandelions are being foraged on by the bees. As far as I can tell Hive #1 looks great. One thing I've noticed every time I've gone out there is that Hive #1 seems to have a lot more activity coming and going through the entrance. Not sure why this is, but the inside of the hives look basically the same and I can't tell that one hive is ahead of the other in terms of larvae, pollen and nectar.
Once I'd examined and seen what I wanted to see in the hives, I set the new box of frames with the one frame of drone comb on top of the other two hive boxes. I then put the inner cover on, and set the pint jar back in place so they'd have a reserve of food if it rains the next several days, as the forecast is warning. I then put the empty box on the inner cover, which basically works as a spacer for the pint jar feeder, and lastly the outer cover. I gathered all of my tools, closed the gate, and let the smoker fuel burn out and emptied the ash on the ground, loaded everything back into the Jeep and headed back to the house.
I will leave them alone for a week or so and then check them again to see how much comb they have built in that third box. If it looks like a lot, I will take the hive apart and arrange the three brood boxes with the fullest one on the bottom, and the one with the most empty frames on top. I'll remove the pint jar, add the queen excluder (which is a grid that the queen can't fit through but the workers can), and then a honey super (the 10 frame box that the bees use to store their surplus honey). Since the queen can't fit through the excluder, no eggs can be laid in the honey supers, and as each one fills, you keep adding another one until late summer. At that point you determine how much stored honey the bees will need to get through the winter, and you basically steal the rest. We're a long way from that point but based on the way things look thus far, most of the comb should be built by the end of the month, and the rest of the summer should be a whole lot of honey storing and rearing of baby bees. I'll need to keep an eye on things in the bottom part of the hive so that things don't get too crowded, which causes swarming behavior, and sets the hive back because half the population leaves, and you have to replace the queen immediately or you lose a whole 21-day brood cycle. Mature hives are the most prone to swarming and since these are first-year hives, I don't expect to have to deal with this issue, unless things get really hot sooner than normal, and there's an above average amount of blooming things and the bees get ahead of me. I bought plenty of extra equipment in case I need to split a hive to prevent it from swarming, so that's my emergency plan if things look like they are headed that way. I'll set up a third hive and order a new queen, and move the old queen and half of the brood and half of the bees into the new hive, and put the new queen in the old hive. Hopefully that won't be necessary until next year...
 Here's a picture I took last week, right after the queen was released into the hive. Since I had only nine frames in each hive because the queen cage was wedged in there, there was extra space and a big gap between a couple of the frames. Since bees don't like big open spaces, they attempt to fill them with comb. I had to scrape this off and remove it before I could fit the tenth frame in the box. Kind of creepy looking. I saved it to show Greg. It smelled like honey.
Sunday, May 8, 2011
Sunny 2.0: The Big Muddy
Last weekend Greg and I rebuilt the foundation for the clay oven and poured a concrete counter-top. We took the forms off on Tuesday evening and for our first concrete counter-top attempt, it turned out really great. On Saturday (yesterday) Greg headed to Menards for some stuff he needed for installing some drainage tile in some low areas in the vineyard. Before he left, he mixed up some coffee colored stain in a spray bottle and sprayed the concrete. It dried pretty quickly and looks great. We may do another layer of stain once Sunny is finished, then we will seal it. 
While he was gone, I got started on Sunny. I hosed off the concrete and spent some time leveling the sand bed and installing the fire bricks. I leveled the sand, added a little, and slid the bricks into position, and tamped them down with a hammer so they were flush with the edge of the concrete.

Once done with that, I gathered together all the bags of sand I could find and started building the dome on top of the bricks. The dome will serve as the mold for the oven shell and once the shell is hard enough to support it's own weight, the sand can be pulled out leaving a cavity. I got about half way through building the dome when I realized I might not have enough sand. I stopped, shoveled all of the sand into 5-gallon buckets, and went looking for something to take up some of the space in the dome. After considering several things, including a 5-gallon bucket, I realized that whatever I used needed to be able to fit through the 10-inch tall doorway opening, which would be the only way to remove it. This eliminated the bucket as an option. I eventually settled on four plastic milk containers. I filled them with water and tightened the lids, and arranged them in the center of the circle I'd drawn as the outline of the dome. I then started piling all of the sand back into a dome shape.
Before I built Sunny 1.0 I had read Kiko Denzer's book "Build Your Own Earth Oven" and used it as a guide for my own clay oven. One mistake I made, in spite of the book's indication that it was pretty important, was that I made the door too tall, which caused a lot of heat loss, and took a long time to heat it up to temperature. I had used a slab of quartzite as a sort of lintel and it was unable to withstand the high temperature, and eventually fell apart (well actually it exploded into pink shards).
This time, instead of a horizontal rectangular opening, I'm going to use an arch which will make building a door a bit more complicated but should be a very strong opening.
Back to the sand, once I'd piled up a dome the dimensions of the oven cavity I wanted (17 inches high, 29 inches across) I soaked some newspaper in water and covered the dome with it. This helps to separate the oven shell as it dries, from the sand which will be removed by hand. It makes removing the sand easier, and also prevents sand from clinging to the inside of the shell of the oven, and raining down on your pizza as it cooks. Any bits of paper still clinging to the oven shell will burn out with the first fire.

It was really windy and I had some problems with keeping the newspaper stuck down on the dome, and it kept drying out so I had to periodically mist it with the hose, and finally just put a block of wood on top of it.
I had all of my buckets of mud that I had saved from Sunny 1.0 and it was wet and ready to use so I got started building the oven.
I picked up big handfuls of mud (sand and clay in a 1:1 mix) and started going around the bottom of the dome, building a wall roughly 4 inches thick.
 As I moved around the oven in a spiral, the wall got higher and higher. I used a piece of 2 x 4 to firm and shape the wall as I went, and made every effort to keep it a consistent thickness all the way up. The wind helped to quickly dry the mud and stiffen it, but I realized there was some slumping on one side (the mix used there may have been a little wetter than ideal) and so I slowed down the building process to allow the mud to set up a little and gain some strength to support the weight of the wall.

This took the better part of the day and as I got close to the top, I realized I was going to run out of mud before I ran out of dome, so I gathered up a bunch more clay from a hole Greg had dug the other day, and watered it down. I added sand and spent at least an hour trying to get it homogenized by hand. By the way, I don't recommend this method. My hands are still extremely sore, and I can barely type.
I managed to get most of the clay and sand incorporated together but not before using more water than I should have, leaving me with a very wet mix.
I decided to let the mix set up overnight hoping that the clay minerals would rehydrate and take up some additional water into their actual crystal structure, making for a smooth mix with plenty of strength. The two separate mixes may be a problem when I go to finish the oven if the new mix and the old don't bond together well, but I think I have a solution for that. I have a bunch of 4 inch galvanized nails that I'm going to stick into the existing shell and use them as a kind of rebar or "key" to tie the two together. It may still crack but since the insulation layer will be going over it, I'm not really worried about heat loss, just the strength of the shell.
Today (Sunday) I hope to finish the inner shell, finish the insulating layer, and cut the door opening. I think I'll leave the sand inside for a few days just to support the "weak area" as long as possible.
Once the insulation layer is finished I'll let it set up for a couple of days, and then mix up a third layer of mud that will include fine chopped straw, sand, and clay. This will be the finish or plaster layer and the texture will allow me decorate it either by sculpting a design or adding some pebbles in a cool pattern. After that, the only thing left to do is put on the stucco textured coating on the vertical faces of the cinder block foundation, and then paint it. Oh, and start cooking pizza...
 The last picture demonstrates the difference in color between the Old Sunny clay and the new clay dug out of the ground a couple of days ago. The sand to clay ratio is about the same so hopefully it will shrink pretty uniformly as it dries. My only concern is that the Old Sunny clay has been subjected to high temperature (but not high enough for it to undergo vitrification obviously) so it may not respond the same way to firing the oven.
Guess we'll find out. I can always start over again. It's only dirt, right?

While he was gone, I got started on Sunny. I hosed off the concrete and spent some time leveling the sand bed and installing the fire bricks. I leveled the sand, added a little, and slid the bricks into position, and tamped them down with a hammer so they were flush with the edge of the concrete.

Once done with that, I gathered together all the bags of sand I could find and started building the dome on top of the bricks. The dome will serve as the mold for the oven shell and once the shell is hard enough to support it's own weight, the sand can be pulled out leaving a cavity. I got about half way through building the dome when I realized I might not have enough sand. I stopped, shoveled all of the sand into 5-gallon buckets, and went looking for something to take up some of the space in the dome. After considering several things, including a 5-gallon bucket, I realized that whatever I used needed to be able to fit through the 10-inch tall doorway opening, which would be the only way to remove it. This eliminated the bucket as an option. I eventually settled on four plastic milk containers. I filled them with water and tightened the lids, and arranged them in the center of the circle I'd drawn as the outline of the dome. I then started piling all of the sand back into a dome shape.
Before I built Sunny 1.0 I had read Kiko Denzer's book "Build Your Own Earth Oven" and used it as a guide for my own clay oven. One mistake I made, in spite of the book's indication that it was pretty important, was that I made the door too tall, which caused a lot of heat loss, and took a long time to heat it up to temperature. I had used a slab of quartzite as a sort of lintel and it was unable to withstand the high temperature, and eventually fell apart (well actually it exploded into pink shards).
This time, instead of a horizontal rectangular opening, I'm going to use an arch which will make building a door a bit more complicated but should be a very strong opening.
Back to the sand, once I'd piled up a dome the dimensions of the oven cavity I wanted (17 inches high, 29 inches across) I soaked some newspaper in water and covered the dome with it. This helps to separate the oven shell as it dries, from the sand which will be removed by hand. It makes removing the sand easier, and also prevents sand from clinging to the inside of the shell of the oven, and raining down on your pizza as it cooks. Any bits of paper still clinging to the oven shell will burn out with the first fire.

It was really windy and I had some problems with keeping the newspaper stuck down on the dome, and it kept drying out so I had to periodically mist it with the hose, and finally just put a block of wood on top of it.
I had all of my buckets of mud that I had saved from Sunny 1.0 and it was wet and ready to use so I got started building the oven.
I picked up big handfuls of mud (sand and clay in a 1:1 mix) and started going around the bottom of the dome, building a wall roughly 4 inches thick.
 As I moved around the oven in a spiral, the wall got higher and higher. I used a piece of 2 x 4 to firm and shape the wall as I went, and made every effort to keep it a consistent thickness all the way up. The wind helped to quickly dry the mud and stiffen it, but I realized there was some slumping on one side (the mix used there may have been a little wetter than ideal) and so I slowed down the building process to allow the mud to set up a little and gain some strength to support the weight of the wall.
This took the better part of the day and as I got close to the top, I realized I was going to run out of mud before I ran out of dome, so I gathered up a bunch more clay from a hole Greg had dug the other day, and watered it down. I added sand and spent at least an hour trying to get it homogenized by hand. By the way, I don't recommend this method. My hands are still extremely sore, and I can barely type.
I managed to get most of the clay and sand incorporated together but not before using more water than I should have, leaving me with a very wet mix.
I decided to let the mix set up overnight hoping that the clay minerals would rehydrate and take up some additional water into their actual crystal structure, making for a smooth mix with plenty of strength. The two separate mixes may be a problem when I go to finish the oven if the new mix and the old don't bond together well, but I think I have a solution for that. I have a bunch of 4 inch galvanized nails that I'm going to stick into the existing shell and use them as a kind of rebar or "key" to tie the two together. It may still crack but since the insulation layer will be going over it, I'm not really worried about heat loss, just the strength of the shell.
Today (Sunday) I hope to finish the inner shell, finish the insulating layer, and cut the door opening. I think I'll leave the sand inside for a few days just to support the "weak area" as long as possible.
Once the insulation layer is finished I'll let it set up for a couple of days, and then mix up a third layer of mud that will include fine chopped straw, sand, and clay. This will be the finish or plaster layer and the texture will allow me decorate it either by sculpting a design or adding some pebbles in a cool pattern. After that, the only thing left to do is put on the stucco textured coating on the vertical faces of the cinder block foundation, and then paint it. Oh, and start cooking pizza...
 The last picture demonstrates the difference in color between the Old Sunny clay and the new clay dug out of the ground a couple of days ago. The sand to clay ratio is about the same so hopefully it will shrink pretty uniformly as it dries. My only concern is that the Old Sunny clay has been subjected to high temperature (but not high enough for it to undergo vitrification obviously) so it may not respond the same way to firing the oven.
 Guess we'll find out. I can always start over again. It's only dirt, right?
Thursday, May 5, 2011
Dey Tuk Er Cloz!!!!!!

Things are about to get a whole lot warmer around here, and just in the nick of time, the sheep shearer worked us into his schedule. Here's a before picture of my little flock of sheep, the morning of the Big Day.

I kept them locked in the barn overnight so they'd be completely dry when he arrived. The sheep stall is 16 x 24 feet, which is pretty large for a dozen sheep and makes it very hard to catch them, so I crowded them into one corner of the sheep stall with a moveable panel. This allowed just enough room for the sheep and the shearer and his equipment.
 When he arrived, he plugged in his shears, put down a 4 x 8 sheet of plywood on the stall floor and got started. Here's the motor part of the shearers.
He grabs a sheep, lifts it off the ground, sets it down on its rear end, and runs the clippers in the same pattern every time, starting with the stomach, up one side of the sheep, across the head and face, under the chin, and back down the other side.

It takes him less than three minutes to shear one sheep. The wool ends up mostly in one big piece. As he finished a sheep, he let it up off the floor and it scrambled back to the flock, and he handed the fleece off to me. They get over the drama pretty quickly, especially if there's hay around to distract them.
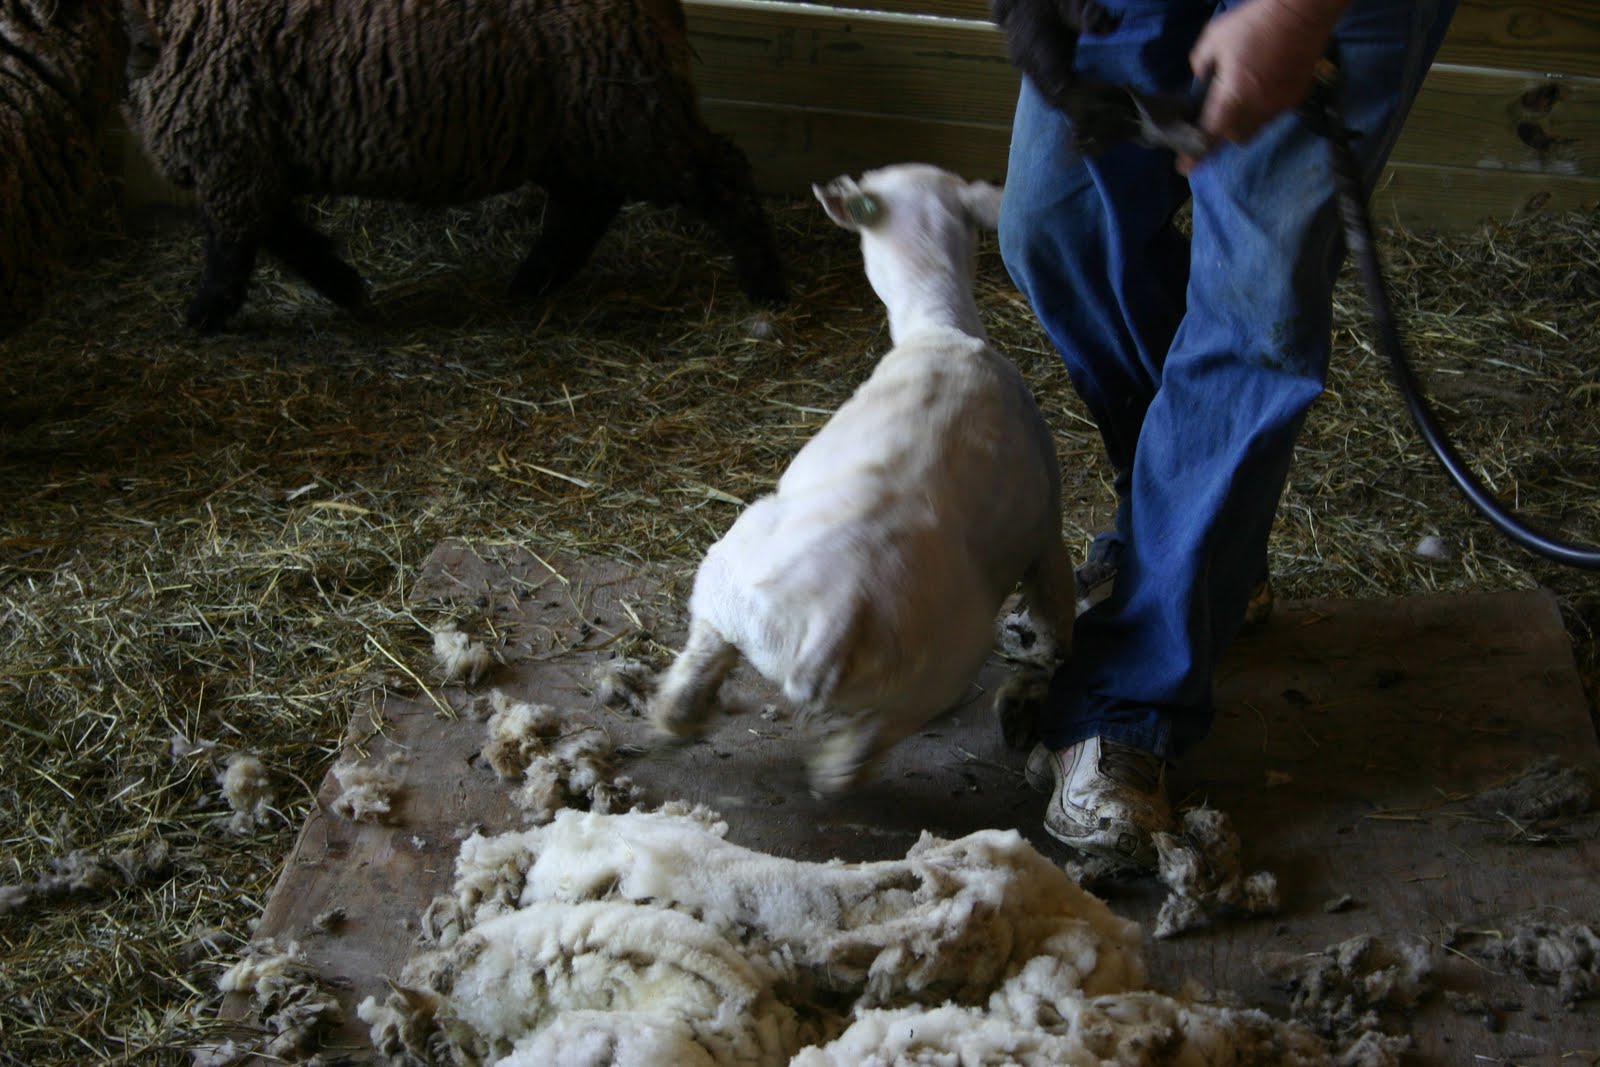
I have a bunch of mesh laundry bags and the fleece is rolled up and stuffed into a bag and stacked to await processing. The bigger sheep have been through this and put up with it pretty well. This was the first shearing for the six little lambs and although they are much smaller, they are much less tame and did a lot more kicking and squirming, except for this little guy. He was very sick around Christmas, and I spent several weeks giving him shots and oral medicine, and lots and lots of treats to help him put weight back on. He's my little buddy now, and tame as can be. He's grown a lot since Christmas but I still can't keep myself from picking him up like a puppy. He doesn't seem to mind, and knows there's a handful of grain in my pocket at all times. He's rather spoiled. His name is Todd Helton but I call him Shrimp because he's pretty small.

It's always amazing how small they look once they've lost their wool. In fact, last year was my first experience with shearing and I was stunned at the difference.

Several of the sheep had gotten so wooly and scraggly that there's no way they could see much through the wool covering their eyes.

The black sheep had turned a rich dark chocolate color due to the sun fading their wool but when the shearer was finished with them they had returned to their jet black color. At least for a while. This little guy is Jorge Dela Rosa. He was by far the wooliest of the lambs. Not Anymore! Heh...

Tuesday, May 3, 2011
Construction Zone: Sunny 2.0
 Saturday morning we got up early and decided to tackle taking apart the clay oven (Sunny). The plan was to remove the clay dome and hopefully save the clay to reuse in the new oven. I wasn't sure this was going to work because the inner shell of the oven had been exposed to some pretty big, very hot fires, many burning for four to five hours. I wasn't sure whether the inside of the oven had reached a temperature high enough to vitrify the clay, which would prevent us from softening it and reusing it. I had a suspicion we'd be dealing with a large, turtle-shell-shaped BRICK. Greg headed to Menard's (like Home Depot) for some supplies we'd need, and I set to work demolishing Sunny.
I took a few photos during the process and used my rock hammer, which has been collecting rust on Greg's workbench for years, and started pounding on the oven. After several hard whacks, I started making slow progress. I headed out to the barn to look for the sledge hammer thinking that was the right tool for the job, but couldn't find it. Anyway, as I broke through the outer layer of "cob" a mixture of clay, sand and chopped straw, I realized it was coming apart in a distinct layer, separate from the inner clay-sand layer, exactly as I had built it.
I threw the outer layer pieces into the wheelbarrow,
 and as I broke through the dense inner layer, I threw those pieces into a big black tub that normally serves as a sheep water trough. The demo took about an hour and when I was done, I removed the fire bricks and set them aside, leaving the cinderblock foundation and the sand bed that had held the fire bricks.
Greg and I came up with a plan and got busy building the wood and melamine forms to serve as the outer shell of the concrete countertop, which we were going to pour on top of the cinder blocks. We made an outer frame and an inner frame to keep the concrete from covering the sand bed.


Once the framing was done, Greg rounded up some rebar and some pieces of a cattle panel to serve as structural support for the concrete. We debated how we wanted to finish the edge of the countertop and just decided we'd leave a sharp edge and then use a sanding block or his orbital sander to round the edges over once everything is finished. Greg picked up some concrete stain at Menard's that can be sprayed on after the concrete dries, so it isn't just plain old gray. Since the clay is a warm tan/brown color, it should blend in well. We plan to stucco the vertical surfaces of the cinder blocks with a surface-bonding cement and then paint that the color of the trim on the house so it should blend with the brown of the concrete pretty well.

Greg borrowed an electric concrete mixer from someone he works with and he'd calculated how much concrete we'd need so once we'd formed up the frames we quit for the day and planned to start early Sunday morning pouring the concrete.
Before we cleaned up our mess, I filled the buckets and water trough containing the remains of Sunny with water from the hose. I figured we'd leave it overnight and hopefully by the following morning the water would have softened the clay enough to determine if we'd be able to reuse it.
On Sunday, we got up early so we could get going on the concrete pour. I checked the buckets and sure enough, everything had become a mushy, gritty goo. Perfect. All I'd need to do is let it settle and skim off the water layer on top of each bucket, add a little extra sand and clay and we'd have plenty of material to build a bigger, thicker-walled oven.
Greg set up the rebar inside the frame and we fired up the mixer. Greg ran the mixer and I shoveled the wet concrete into the frame. We used seven 80-lb bags of concrete to fill the frame, and once we were done, Greg used a 2 x 4 to smooth the mix and level it, then we left it to set up. After it had set up somewhat, Greg worked on finishing the surface as smoothly as possible. We may need to polish it with the sander before we stain and seal it. Maybe not though. It looks pretty good to me.
 We wet it down with a hose and covered it with a tarp to slow down the drying process to allow it to cure.
Once we had rinsed out the concrete mixture, we decided to try using it to homogenize the recycled cob. We processed each bucket as it's own batch, and ran the mixer for several minutes on each batch. This worked really well and managed to break up most of the chunks of clay. Once we get to the point of rebuilding the actual oven, things should go pretty fast since I won't be starting from scratch. It takes quite a bit of time to manually mix the ingredients for the oven. Having the mixer was a huge time saver.
One thing I'm going to do differently this time is put a sheet of aluminum on top of the sand layer and below the fire bricks. This should help reduce the heat loss through the bricks into the sand layer. Another thing I'm going to try is a one to two inch insulation layer of clay/sand/straw and vermiculite on top of the clay/sand thermal layer. I hope to really cut down on the heat loss through the walls of the oven by incorporating the vermiculite as an insulator. I'm also going to increase the wall thickness of the thermal layer to 5 inches. It will take a little longer to heat the oven up to temperature but it should stay hot much longer by doing all of these things. This will potentially allow several hours of cooking, starting with pizza and breads, which require very high temperature but cook very fast, followed by slow roasting of vegetables and chicken as the oven slowly cools. Finally, by loading the still-warm oven with a stack of firewood, the residual heat will help to dry it out so it will be ready for the next firing.
A well fitting door and possibly a chimney with a damper are also design features that I did not use in the old oven but may use with Sunny 2.0. By putting in a chimney above the door, I hope to be able to get more complete combustion inside the oven, cut down on the soot around the door (which gets all over you and doesn't look particularly attractive). A tight fitting door will be a lot more functional and safer than stacking bricks in the opening, which is how we closed up the old oven. This oven will definitely be a lot more user friendly.
We wet it down twice a day on Monday, and again on Tuesday morning, and once Greg got home from work, we took the forms off. Here's what it looks like thus far. The hole in the middle is exactly the size of the fire bricks. We will install them after we wet down and tamp the sand bed. We planned everything out so once we put the bricks back in the hole, they will be at the same height as the surface of the concrete and everything will be flush and smooth, so the pizza peel will slide in and out easily.
Here's how it looked today (Tuesday) when we took off the frame.

Here's a link to my inspiration, a 9 foot tall oven called "Maya" in a restaurant in Corvallis, Oregon built by Kiko Denzer...
http://www.intabas.com/images/bigmuthuoven.jpg
Friday, April 29, 2011
Last Firing of Sunny 1.0
It's Friday night, windy as all get out, and we're firing Sunny for the last time. Tomorrow the plan is to tear it apart and pour a concrete countertop on top of the cinder blocks, then put a surface-bonding cement coating over the cinder block foundation. The countertop will be stained with a spray on stain. We've been wanting to try out stained concrete on a project and this will give us a chance to see if we like it. I'm thinking we will. The cinderblocks with the stucco coating will be painted the color of the trim on the house, and with any leftover stain, we will probably put a bit on the actual new clay oven so it will blend with the countertop. It should be really pretty.
Here's a video Greg made tonight.
Here's a video Greg made tonight.
Wednesday, April 27, 2011
I Return My Flower, A Changed Bee...

Another milestone today. Greg took this picture of a honeybee collecting pollen on a dandelion. Those little orange thingies are sacs on the back legs, which the bee uses to store the pollen she collects on her rounds. When she returns to the hive, other bees will help unload it and stuff it into comb cells for future use in feeding the larvae. This is a good sign and the first indication I have seen that the bees are actively foraging.
Monday, April 25, 2011
Hive Update

I checked on the hives this morning, added syrup to the feeders, and checked on the queens. Both queen cages are empty, meaning the workers chewed through the marshmallows that I had plugged the cage holes with, and released each queen into the hives. Here are a few pictures I took this morning. Things have settled down considerably out there.
There are two hives, both facing south, with one on the east end of the platform and the other on the west end. I'm going to refer to the west hive as hive 1 and the east hive as hive 2. The first picture is of hive 1 with the lid off, before I pulled the empty queen cage out from between the frames.

When I opened the hives, the bees were all over the tops of the frames. When the lid comes off, they instinctively rush to the top of the hive ready to defend it from whatever just took the roof off. Since I needed to get the cages out, I used smoke to drive the bees back down into the frames. here's Li'l Smokey getting fired up and ready to work... I use cedar hamster bedding as the fuel, and newspaper to get it started.
Saturday, April 23, 2011
Whew!!!
They're in! We transferred the two packages of bees into their new hives. Each package contained four pounds of bees and a single queen. Here's how it went...

We loaded the tools, a gallon of syrup, the guidebook, the smoker and fuel for it, and the two packages of bees into the truck. I suited up in my new bee suit and put on the veil and we headed downstairs. Doogan and Sophie both freaked out at the sight of the bee suit until I took the veil off and they realized it was me. The picture to the left is what one package of four pounds of bees looks like.
Once we got out to the vineyard, we opened the gate and I put all of the tools and supplies on the platform between the hives. Greg ran the camera from a safe distance, since he has no bee suit. I then put a package of bees next to each hive and took the cover and feeder off the hives. I've never done this before so I wanted to take my time and not screw up and end up standing there watching my bees fly away.

With the hive tool, I pried one of the cans of syrup out of the first package and slid the little box containing the queen out of the package and covered the hole with a coffee can lid. There were probably a dozen or so bees clinging to the queen cage. I brushed them into the hive, after removing five of the foundation frames. I then wedged the queen cage between a couple of the frames, but not before realizing that there was a cork but no candy in the queen cage, meaning there was nothing to puncture with a nail to allow the bees to chew through to release her over the next couple of days. That means I'm going to have to release her myself in a couple of days once they all get acclimated to their new hives.
Once I wedged the queen cage between a couple of frames, I used a stapler to attach the metal strip attached to the cage to the top of one of the frames so she wouldn't slide down to the bottom of the box. I then picked up the package, banged it on the platform a couple of times, and flipped it upside down, dumping the majority of the bees into the into the hive where the missing frames left a big space. Unfortunately, I failed to remove the coffee can lid that I had temporarily covered the hole in the lid of the package while I finagled around with the queen cage. Once I dumped about 20,000 bees in there, it was going to be way too disruptive to reach in there and retrieve it so it is still in there. I plan to get it tomorrow when I go back to release the queen and replace the missing frames in each hive.
After I put the bees in the hive, I put the feeder on top and then poured about a half gallon of syrup into one side of the feeder so the bees have plenty of food, then put the inner cover and the outer cover on the hive. The only thing I forgot to do was put the pollen patty that I had made to supplement the diet until there's enough real pollen in the area for them to collect. I left it on the platform. I'll put it in there tomorrow when I open the hive to release the queen.
Once the first hive was finished, I had a few minutes to reflect on the mistakes I'd made and on the second hive, I managed to do everything right and things went pretty smoothly. With both packages, I could not get 100% of the bees out when I dumped them out. According to conventional wisdom, putting the open package in front of the entrance to the hive will eventually encourage the stragglers to crawl or fly out of the opening and into the hive, because they can smell the beeswax on the foundation frames, and they can smell the pheromones of the queen, which is still trapped in her cage. We'll go out there in the morning and see if that's true.

All in all, things went pretty much without a hitch. Once the queens are released into the hive population, they should start laying eggs and raising new bees. Within a week I will need to go out there and pull out a couple of frames and examine them to see if the queen has put any eggs in them. If not, I will need to estabilish if she is still alive, and if not, I will need to order a new queen, quickly.
I noted today that there were quite a few dandelions in the grass around the hives so I would expect that if it is warm enough, some of the bees will begin to forage immediately. The sooner they do, the faster the hive population will build up and the more honey they potentially will make.
Honey and Bees and Hives, Oh My!
Finally after months of waiting and preparing and painting and assembling, the bees have a new, permanent (hopefully) home. Here are a few pictures of the process...
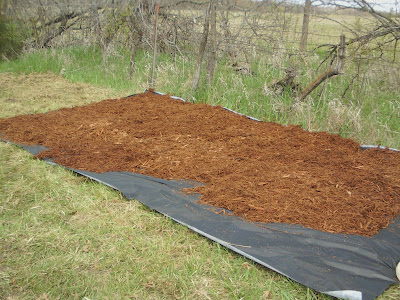 About a week ago we sprayed grass killer in this area where we planned to put the bees. This morning, Greg mowed the area with a brush cutter to get it as flat as possible. We then laid out this landscape fabric and dumped cypress mulch on top of it. This will keep the grass from growing up around the hives, and eliminate the need for running the weed-eater near them, which the bees hate. I also lopped off any branches that were hanging over the hive area. I don't need them falling on the hives and knocking them over. This area is toward the back of the property, near the pond, and up high and facing south.
 Next, we set up a platform out of cinder blocks and pressure treated eight foot 2 x 6 boards I picked up a few days ago at Menard's. Once the platform was reasonably level, we set up the hives on top of the boards, leaving enough room to walk behind them or put hay bales back there as a wind screen in the winter.
Here's what the whole thing looks like finished. Now all I have to do is transfer the bees from their travel boxes to their new homes.
About a week ago we sprayed grass killer in this area where we planned to put the bees. This morning, Greg mowed the area with a brush cutter to get it as flat as possible. We then laid out this landscape fabric and dumped cypress mulch on top of it. This will keep the grass from growing up around the hives, and eliminate the need for running the weed-eater near them, which the bees hate. I also lopped off any branches that were hanging over the hive area. I don't need them falling on the hives and knocking them over. This area is toward the back of the property, near the pond, and up high and facing south.Next, we set up a platform out of cinder blocks and pressure treated eight foot 2 x 6 boards I picked up a few days ago at Menard's. Once the platform was reasonably level, we set up the hives on top of the boards, leaving enough room to walk behind them or put hay bales back there as a wind screen in the winter.Here's what the whole thing looks like finished. Now all I have to do is transfer the bees from their travel boxes to their new homes.
Friday, April 22, 2011
Box O' Bees...

I picked up my two packages of bees today. I drove about an hour north of here to the Bee Man's house to pick them up. I finished up assembling and painting the last few parts of the hives this morning, and they're ready to go to the vineyard tomorrow.
The bees came to Iowa on a trailer from Northern California, and each package includes about 20,000 bees, and a tiny box containing the mated queen. Tomorrow I will install them in their new homes.
I was a little nervous about driving home with them in the Jeep but they did fine. Only two bees got loose in the car, and they joined me in the front seat, and as soon as I cracked open the window, out they went. They were apparently clinging to the outside of the cage when I put them in the back of the Jeep.
The little circle on top of each box (in the picture above) is a can that contains corn syrup or some other sugar mixture, (probably from Cargill, LOL) and it has a hole on the bottom so the bees can feed themselves during the trip from the West Coast. I just checked and the cans are still about half full. I put the boxes in the garage for the night and will install them in the morning once I get everything set up in the vineyard. The weather is really crummy today, light rain and kind of cool. The bees were pretty sluggish. Tomorrow is supposed to be much better, warmer and sunny. I'll put plenty of syrup in the hive feeders so the bees don't get hungry but there are things starting to bloom around here, including dandelions and some kind of wild cherry bushes, as well as some maple trees in the surrounding woods so it should be warm enough for them to start leaving the hive right away and foraging on their own, at least on sunny days.
Tomorrow will be exciting. I will take the boxes up to the vineyard and take a few frames out of the hives. The little box containing each queen will be pried out of the hole with the can, which will be discarded, and the cork in the queen box will be removed. Inside the hole in the little box is a piece of squishy candy which prevents the queen from running out of the box. Over the course of the next three days or so, the bees will chew through this candy and release the queen into the hive, where she will take up residence. Once I put the queen box in between a couple of frames in the hive box, I'll bang the bee box on the ground, flip it over, and dump the bees into the hive through the hole in the top of the box. After that, I'll put the feeder on, with some syrup, and then the lid. According to my bee class instructor, you should leave the hives alone for three to four days, to allow everything to settle down,give the bees a chance to let the queen out of her box, and start building comb on the foundation, which is coated with beeswax to encourage them to get started. Once there is comb, the queen will follow along behind and lay an egg in each cell of the comb. In 21 days, there will be a new generation of bees in the hive. This will go on all summer to the point that there are 60 or 70 thousand bees in each hive.
I will take pictures tomorrow as I set things up out there and get the bees into the hives. I'm sure Greg will be filming too (from inside the truck)...
Saturday, April 9, 2011
Mmmmm

I went to my bee club meeting last night and a lady was selling these eggs from her flock of chickens. These were laid on Thursday and I paid a buck fifty. They look like something Martha Steward would show up to your house with for a housewarming party. They're almost too pretty to eat. Almost!
Wednesday, March 30, 2011


Subscribe to:
Posts (Atom)
